Maintaining an air compressor ourselves requires a systematic approach to guarantee safety and efficiency. We need to regularly inspect components like hoses, filters, and gauges for signs of wear or leaks, and verify that all electrical connections remain secure. Proper lubrication, filter replacement, and moisture drainage are critical steps that directly impact performance and lifespan. Understanding these procedures in detail helps prevent costly repairs and downtime, making it essential to follow a structured maintenance routine—something worth exploring further.
Key Takeaways
- Regularly inspect and replace filters, hoses, and fittings to prevent leaks and maintain airflow efficiency.
- Check and calibrate pressure gauges, and verify safety valves function properly before use.
- Drain moisture daily and flush tanks periodically to prevent rust and ensure clean operation.
- Lubricate moving parts with appropriate oils as specified by manufacturer guidelines.
- Establish and follow a maintenance schedule for safety checks, filter replacements, and system inspections.
How to Inspect Your Air Compressor Before Maintenance
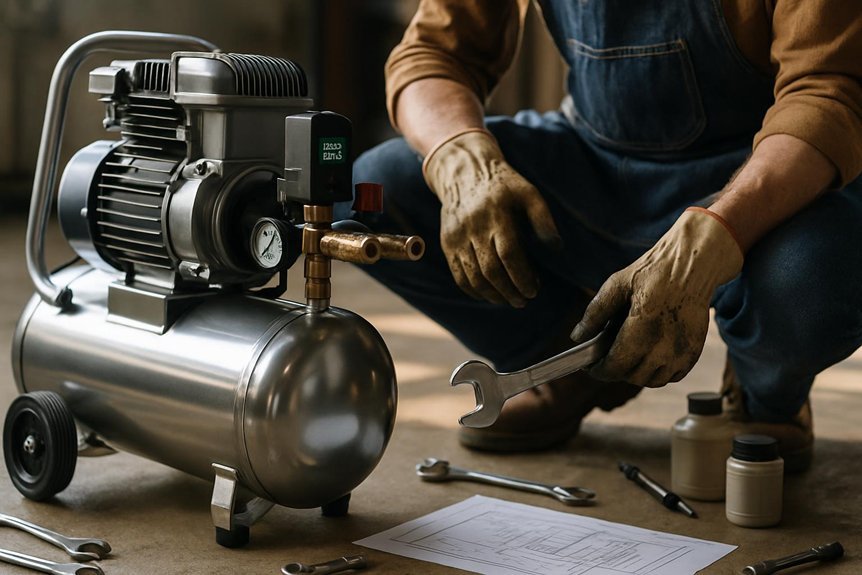
Before performing maintenance on your air compressor, it’s essential to conduct a thorough inspection to identify potential issues early. Begin by examining air compressor accessories, such as filters, hoses, and pressure gauges, ensuring they are secure and free of damage. Check for leaks around connections and fittings, as these can impair performance and indicate underlying problems. Inspect the compressor’s belts and pulleys for wear or misalignment, which could cause malfunction. Troubleshooting common issues starts with verifying proper electrical connections and ensuring the motor operates smoothly. Listen for unusual noises that may signal mechanical faults. Visual inspection for corrosion, dirt buildup, or damaged components helps prevent breakdowns. A detailed initial assessment allows us to address problems proactively, maintaining ideal compressor function.
Changing the Oil and Lubricants for Optimal Performance
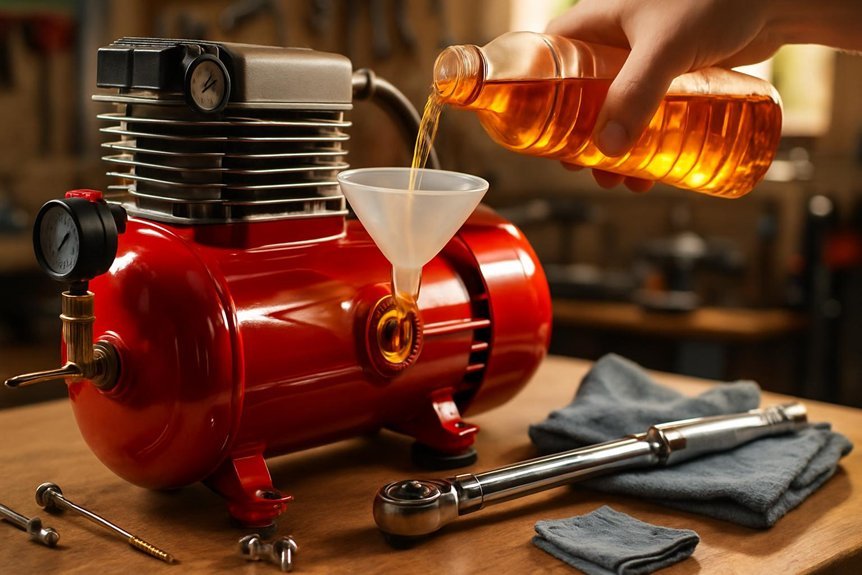
Have you confirmed that your air compressor’s oil and lubricants are at ideal levels and in good condition? Proper lubrication is essential for peak performance. First, check the oil viscosity—use a viscosity chart to ensure it matches the manufacturer’s specifications. Second, identify the correct lubricant types, such as synthetic or mineral oils, suitable for your compressor model. Third, drain the old oil completely to prevent contamination. Fourth, refill with fresh oil, ensuring it’s at the recommended level. Regularly replacing lubricants prevents sludge buildup, reduces wear, and maintains efficiency. Always refer to the manufacturer’s guidelines for oil type and viscosity requirements, as using incorrect lubricants can impair compressor function and longevity. Proper maintenance ensures reliable operation and minimizes downtime.
Cleaning and Replacing Air Filters and Intake Vents
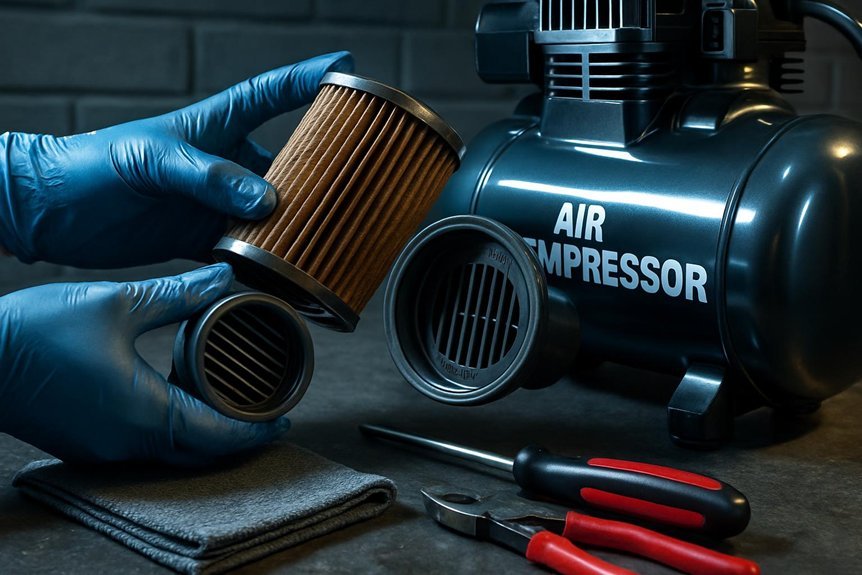
Regularly inspecting and maintaining air filters and intake vents is crucial for guaranteeing peak compressor performance. Effective air filter replacement prevents dust and debris from entering the system, reducing wear on internal components. To perform air filter replacement, remove the filter housing, inspect the filter for dirt accumulation, and replace if clogged or damaged. Intake vent cleaning involves removing any accumulated dust, dirt, or obstructions that could restrict airflow. Use compressed air or a soft brush to clear debris from vents and ensure unobstructed air intake. Maintaining clean filters and vents improves compressor efficiency, prevents overheating, and extends equipment lifespan. Regularly scheduled cleaning and replacement are essential for optimal operation and avoiding costly repairs caused by airflow restrictions.
Draining and Flushing the Compressor Tank
To safely drain and flush the compressor tank, we must first observe proper safety precautions to prevent injury or damage. Next, we’ll follow a systematic draining technique to remove accumulated moisture, ensuring the tank is fully emptied. Finally, we’ll execute a detailed flushing procedure to clear away debris and contaminants, maintaining peak compressor performance.
Safety Precautions First
Before starting any maintenance on the compressor tank, it’s essential to verify the system is completely depressurized and disconnected from power sources. Safety is paramount. Always wear appropriate personal protective gear, including gloves and eye protection, to prevent injury from residual pressure or debris. Guarantee an emergency shutdown procedure is in place to quickly cut power if needed.
- Confirm pressure release by draining residual air and verifying pressure gauges read zero.
- Disconnect from electrical power to prevent accidental activation.
- Wear personal protective gear to safeguard against potential sprays or debris.
- Prepare an emergency shutdown plan in case of unexpected pressure buildup.
Following these precautions minimizes hazards during draining and flushing, ensuring safe, effective maintenance.
Proper Draining Technique
Ensuring the compressor tank is properly drained and flushed is essential for maintaining system integrity and preventing corrosion. Begin by disconnecting power and releasing pressure, then remove the air filter to access the tank opening. Drain accumulated moisture by opening the drain valve fully, allowing water and oil residue to exit. During this process, check the oil level in the compressor; low oil can cause condensation buildup, increasing corrosion risk. After draining, close the drain valve securely and replace the air filter to prevent debris entry. Flushing the tank with a suitable cleaning solution may be necessary periodically to remove internal deposits, but this step is separate from draining. Proper attention to these details ensures the tank remains free of moisture, prolonging compressor lifespan.
Flushing Procedure Steps
Flushing the compressor tank effectively removes internal deposits and contaminants that can compromise performance and longevity. To guarantee proper maintenance, follow these steps:
- Turn off the compressor, disconnect power, and drain residual air by opening the drain valve.
- Remove the air filter and inspect it for debris; replace if clogged or dirty.
- Connect a flushing solution or clean water to the tank’s inlet, then open the drain valve to flush out sludge and scale.
- After flushing, close the drain valve, reinstall the air filter, and perform an oil change if applicable, ensuring lubrication systems remain clean. This process helps maintain ideal airflow, reduces corrosion, and extends the lifespan of the compressor.
Checking and Tightening Hoses, Fittings, and Connections
We need to systematically inspect hoses for cracks, wear, or damage that could compromise airflow. Securing fittings tightly prevents leaks and maintains system pressure, so we’ll check and tighten all connection points as needed. Additionally, we must identify and repair any leaks promptly to guarantee peak compressor performance.
Inspect Hose Integrity
How can we verify that our air compressor’s hoses and fittings are secure and functioning properly? First, examine the hose material for signs of wear, cracking, or bulging, which compromise integrity. Next, inspect connection types—whether threaded, quick-connect, or crimped—to ensure they’re properly engaged without leaks. Third, check for any loose fittings by gently tugging on the hoses; they should remain firmly attached. Fourth, observe for leaks or hissing sounds while the compressor operates, indicating potential pressure loss. Tighten fittings carefully using appropriate tools, avoiding over-tightening that could damage the connection types or hose material. Regular inspection of these elements guarantees safe, efficient operation and prolongs the lifespan of your air compressor system.
Secure Fitting Connections
To guarantee secure fitting connections, it’s essential to methodically check that all hoses and fittings are properly tightened and seated. Secure fittings ensure connection stability, preventing disconnections under operational pressure. We start by inspecting each connection point, verifying that fittings are fully engaged without cross-threading or gaps. Use a wrench to tighten fittings incrementally, avoiding over-tightening which can damage threads or deform components. Focus on maintaining consistent torque to preserve connection stability. Confirm hoses are properly aligned and seated, with no signs of wear or damage at the connection points. Properly secured fittings minimize the risk of leaks and sudden disconnections during operation. Regularly verifying and tightening fittings is a crucial step in maintaining the safety and efficiency of your air compressor system.
Check for Leaks
Have you thoroughly checked your hoses and fittings for leaks? Identifying air leaks is essential for maintaining excellent compressor performance. First, visually inspect all hoses, fittings, and connections for obvious damage or loose fittings. Second, listen for hissing sounds indicating escaping air. Third, use a soap solution around fittings; bubbles reveal leaks. Fourth, if leaks are detected, consider sealant application or tightening fittings. Properly securing fittings reduces air leaks, improving efficiency. When applying sealant, ensure compatibility with compressor components to prevent deterioration. Regular checks and prompt tightening or sealant use maintain airtight connections, preventing energy loss and prolonging equipment lifespan. This proactive approach ensures consistent performance and reduces operational costs.
Testing Safety Features and Pressure Settings
Before operating the air compressor, it’s vital to verify that all safety features are functioning correctly and that pressure settings are calibrated accurately. Begin by inspecting the safety valve, performing safety valve testing to guarantee it releases at the designated pressure, preventing over-pressurization. Next, check the pressure gauge calibration to confirm the readings are precise; inaccurate gauges can lead to unsafe operation. Use a calibrated external pressure source to cross-verify the gauge’s accuracy. Adjust the pressure regulator as needed to match manufacturer specifications. Confirm that all safety mechanisms, including pressure relief devices, respond promptly. These steps are fundamental to maintain safe operation, prevent damage, and assure the compressor functions within safe pressure limits.
Establishing a Regular Maintenance Schedule for Longevity
Establishing a regular maintenance schedule is essential to guarantee the air compressor’s long-term reliability and peak performance. Consistent checks ensure optimal air quality and help minimize noise levels.
- Inspect and replace filters regularly to maintain air quality and prevent contaminants from damaging internal components.
- Drain moisture from tanks daily to prevent corrosion and maintain consistent airflow.
- Lubricate moving parts as specified to reduce noise and wear.
- Perform routine checks on pressure and safety valves to ensure proper function, promoting both safety and efficiency.
Following this schedule keeps the compressor running smoothly, reduces noise, and guarantees clean, high-quality air output, ultimately extending its lifespan and reducing downtime.
Frequently Asked Questions
How Often Should I Replace the Compressor’s Belts or Pulleys?
We recommend replacing belts during routine belt replacement every 6 to 12 months, depending on usage, and inspecting pulleys annually for wear or damage to guarantee ideal compressor performance and prevent unexpected failures.
What Are Signs of Compressor Overheating During Operation?
Signs of compressor overheating include excessive heat, frequent temperature fluctuations, and operational shutdowns. We recommend inspecting the cooling system regularly and employing temperature monitoring to guarantee peak performance and prevent damage during operation.
Can I Use Synthetic Oil Instead of Conventional Oil?
We can use synthetic oil instead of conventional because its superior oil viscosity offers exceptional lubrication, reducing wear and tear. Synthetic advantages include better thermal stability and longer intervals between oil changes, ensuring your compressor runs smoothly under extreme conditions.
How Do I Troubleshoot Unusual Noises From the Compressor?
We troubleshoot unusual compressor noises by conducting vibration analysis to identify imbalance or bearing issues, then apply noise reduction techniques like tightening fittings and replacing worn parts, ensuring peak operation and minimizing disruptive sounds effectively.
What Precautions Should I Take During Compressor Storage?
Did you know that improper storage can cause up to 30% efficiency loss? We guarantee storage safety by draining moisture, applying corrosion prevention measures, and storing in a dry, covered area to maintain compressor longevity and peak performance.
Conclusion
By adhering to these maintenance steps, we guarantee our compressor runs like a finely tuned engine—smooth, reliable, and ready to perform. Regular checks and timely interventions act as the steady heartbeat that keeps the system alive and efficient. Think of it as tending a crucial organ; neglect risks failure, but attentive care guarantees longevity. With discipline and precision, we safeguard our investment, ensuring our compressor remains a steadfast workhorse, ready to power through any job with unwavering consistency.

