Addressing air leaks in an air compressor can sometimes feel like trying to find a needle in a haystack, given how elusive these leaks can be. A small, unnoticed leak can considerably reduce your system’s efficiency, leading to higher energy costs and equipment wear. To prevent this, we need a precise, step-by-step approach that identifies the root cause and guarantees a reliable, long-term fix. Let’s explore how to systematically diagnose and repair these leaks effectively.
Key Takeaways
- Conduct a thorough visual inspection of all connections, hoses, and seals for damage or corrosion.
- Use soap solution to identify active leaks by looking for bubbling at fittings or joints.
- Tighten fittings with a calibrated torque wrench and replace damaged components as needed.
- Apply high-quality sealant or Teflon tape to threaded joints to prevent persistent leaks.
- Perform pressure testing after repairs to ensure system maintains pressure without leaks.
Identify Common Sources of Air Leaks in Your Compressor
To effectively address air leaks in your compressor, it’s essential to first identify the most common sources of leakage. Typically, leaks originate from connections, fittings, or seals that have become loose, worn, or damaged over time. Check the compressor’s manifold, valves, and pressure relief devices for signs of continuous hissing or visible damage. Inspect hose connections and fittings for cracks or corrosion. Pay close attention to the piston rings, cylinder head gasket, and tank welds, as these are frequent leak points due to fatigue or manufacturing flaws. Using a soap solution around suspected areas can help detect bubbles indicating escaping air. Accurate identification of these sources is *vital* for targeted repairs and restoring *ideal* compressor efficiency.
Prepare Your Tools and Safety Measures for Leak Repair
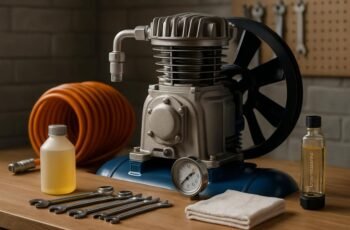
Before starting repairs, gathering the appropriate tools and implementing safety measures is vital to guarantee a smooth and secure process. Essential tools include adjustable wrenches, screwdrivers, replacement fittings, sealant, and a pressure gauge for precise assessment. Safety equipment such as protective gloves, safety glasses, and hearing protection must be worn to prevent injury from high-pressure components or accidental discharges. Confirm the compressor is disconnected from power and depressurized before proceeding. Confirm all tools are calibrated and in good condition to avoid damage or improper repairs. Additionally, work in a well-ventilated area free of ignition sources to prevent fire hazards. Proper preparation minimizes risks, enhances efficiency, and ensures adherence to safety protocols throughout the leak repair process.
How to Perform a Visual Inspection to Detect Leaks?
Performing a thorough visual inspection is a critical initial step in identifying air leaks within your compressor system. Begin by shutting down the compressor and allowing components to depressurize completely. Carefully examine all accessible connections, fittings, hoses, and seals for visible damage, corrosion, or loose fittings. Look for signs of wear such as cracks, erosion, or oil residue that may indicate leaks. Inspect welds and joints for cracks or gaps, and verify fasteners are tight. Utilize a flashlight or mirror to examine hard-to-see areas, and check for any irregularities in the surface conditions. While visual inspection alone may not reveal all leaks, it helps narrow down potential sources for further testing. This systematic approach guarantees no obvious defect remains unnoticed.
Techniques for Sealing and Repairing Air Leaks Effectively
When addressing air leaks, selecting the appropriate sealing and repair techniques is essential for restoring compressor efficiency and preventing further issues. We recommend first isolating the leak source, then choosing a suitable sealing method based on the type of leak. For small punctures or cracks, use a high-quality sealant designed for compressed air systems, applying it precisely to the affected area. For larger leaks or damaged components, replace faulty parts such as fittings, hoses, or valves, ensuring proper torque specifications. Tighten fittings using a calibrated torque wrench to avoid over-tightening, which can cause additional damage. In cases of persistent leaks, consider re-sealing joints with thread sealant or Teflon tape. Accurate identification and application of these techniques ensure reliable, long-term sealing, maintaining compressor performance.
Test Your Compressor After Repairs and Prevent Future Leaks
Once you’ve completed repairs to your air compressor, testing it thoroughly is crucial to make certain that the leaks have been effectively sealed and that the system operates at ideal pressure. We recommend performing a pressure test by running the compressor and monitoring pressure gauges closely. Verify that the system maintains consistent pressure over a designated period—typically 15-30 minutes—without noticeable drops. This confirms that seals are secure and leaks are eliminated. Additionally, inspect all repaired areas for signs of any residual leakage. To prevent future leaks, consider establishing a regular maintenance schedule that includes periodic pressure checks and prompt inspection of hoses, fittings, and valves. Proper testing and preventative measures extend the compressor’s operational lifespan and ensure reliable performance.
Frequently Asked Questions
How Often Should I Inspect My Compressor for Leaks?
We recommend inspecting your compressor for leaks at least monthly, especially before heavy use periods. Regular checks help us identify minor issues early, preventing costly repairs and maintaining ideal performance of the air system.
Can I Fix Leaks Without Professional Help?
Yes, we can fix leaks ourselves by carefully inspecting connections, using soapy water to identify leaks, and tightening or replacing faulty components, but we should always follow safety guidelines and consider consulting a professional for complex issues.
What Are the Signs of a Major Air Leak?
A major air leak shouts loudly through constant pressure drops, hissing sounds, and decreased efficiency. We notice rising energy bills and irregular compressor cycling, signaling a severe leak that demands prompt, precise identification and repair to restore best performance.
Are There Specific Tools for Sealing Different Leak Types?
Yes, we use specific tools like leak detection sprays, ultrasonic detectors, and sealant applicators tailored for different leak types. These tools guarantee precise identification and effective sealing, minimizing downtime and maintaining compressor efficiency.
How Long Does a Typical Air Leak Repair Take?
Typically, air leak repairs take approximately 30 minutes to an hour, depending on leak severity and location. We carefully identify, isolate, and seal leaks efficiently, ensuring the compressor’s performance and preventing future failures effectively.
Conclusion
By following these systematic steps, we can effectively identify, repair, and prevent air leaks in our compressors. Regular inspections and proper sealing techniques guarantee peak performance and longevity. Are we truly maximizing efficiency if we overlook these small, yet costly leaks? Implementing consistent maintenance routines not only saves money but also ensures reliable operation. Staying vigilant and proactive is essential—because a leak-free system is the backbone of dependable air compression.